First off, safety is key. Unplug your dryer to avoid any nasty shocks or accidental starts. It’s like turning off the power before fixing a broken lamp—you wouldn’t want to get zapped! Next, locate the old gasket. Usually, it’s a rubber or felt strip that runs around the door opening. Take a good look at how it’s attached—some are glued, others are simply held in place with clips or screws.
Now, gently pry off the old gasket. You might need a putty knife or screwdriver to help with this, but be careful not to scratch the surface. If it’s glued on, use a bit of adhesive remover to get rid of the leftover glue. Imagine you’re peeling off an old sticker from your laptop; you don’t want any residue left behind.
Once the old gasket is off, clean the area where the new one will go. Any leftover glue or debris could make the new gasket less effective, like trying to stick a new label onto a dirty jar.

Apply a thin layer of adhesive if your new gasket needs it. Then, carefully position the new gasket into place, making sure it’s aligned properly. Press it firmly to ensure it sticks well, just like pressing a sticker onto a clean surface.
After everything is in place, give the door a few gentle tests to ensure a snug fit. Reconnect the dryer, and you’re all set! Replacing a dryer’s door gasket doesn’t have to be a chore—it’s more like giving your dryer a little TLC.
DIY Dryer Repair: A Step-by-Step Guide to Replacing Your Door Gasket
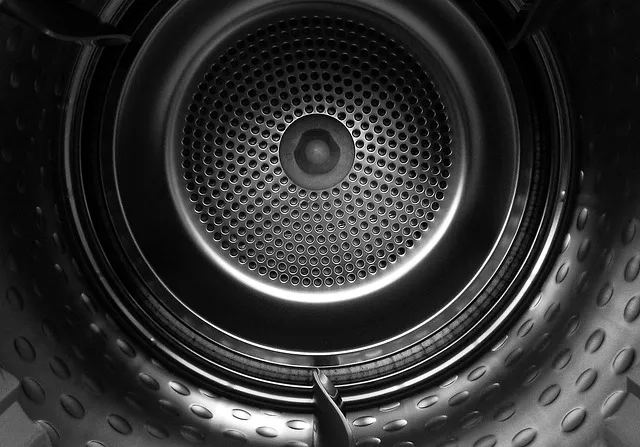
First, let’s talk about what a door gasket does. It’s that rubber seal that lines the door of your dryer, preventing hot air from escaping. Over time, it can wear out, causing inefficient drying or even leaks. So, how do you tackle this job yourself?
Start by unplugging your dryer. Safety first! Then, open the dryer door and inspect the gasket. Look for any signs of wear or damage—tears, cracks, or deformations. Once you’ve confirmed the gasket needs replacing, you’ll need to order a new one. Make sure to get the exact match for your dryer model to avoid any fitting issues.

Now, let’s get hands-on. Remove the old gasket by carefully peeling it off. It’s often held in place with adhesive, so you might need to use a flathead screwdriver to help pry it off. Clean the area where the gasket was attached to ensure the new one sticks properly. A little rubbing alcohol on a cloth works wonders here.
Take your new gasket and press it into place. It should fit snugly into the groove. Be sure to follow the gasket’s natural curve to avoid wrinkles. Once it’s in place, give it a firm press to ensure it’s secure.
Finally, let everything sit for a while to ensure the adhesive sets properly. Plug your dryer back in, and test it out. You should notice that your dryer is working more efficiently, with no more hot air escaping and no more annoying leaks.
And there you have it—your dryer is now ready to tackle that laundry pile with renewed vigor!
Fix Your Dryer in No Time: How to Replace a Worn-Out Door Gasket
First off, let’s talk about what a door gasket actually does. Think of it as the seal around the door of your dryer. Its job is to keep the hot air inside where it belongs, making sure your clothes dry evenly and efficiently. Over time, this gasket can wear out, crack, or become brittle, which can lead to heat escaping and even potentially cause your dryer to overheat. Not good news for your energy bills or your clothes!
So, how do you replace this crucial part? Start by unplugging your dryer—safety first! Next, open the dryer door and locate the old gasket. It’s usually a rubber or silicone strip that runs around the perimeter of the door. You’ll need to remove it, which might involve loosening a few screws or just peeling it off, depending on your dryer model. Make sure you clean the area where the old gasket was attached; any residue could affect the performance of the new gasket.
Now, grab your new gasket, which you can easily find online or at an appliance parts store. Fit it into the groove where the old one was, making sure it’s seated properly all the way around. Once it’s in place, secure it with the screws or adhesive, if required.
And that’s it! By the time you’re done, your dryer should be back to working like new, keeping your clothes fresh and your energy bills in check.
Seal the Deal: Essential Steps for Replacing a Dryer Door Gasket
First off, you need to know where to find a replacement gasket. Dryer models vary, so grab your appliance’s model number and head to the nearest appliance parts store or shop online. It’s like finding the right puzzle piece—you need to make sure it fits perfectly.
Next, get ready for the hands-on part. Start by unplugging the dryer—safety first! Then, open the dryer door and remove the old gasket. This can be a bit tricky, as the gasket is often glued or held in place with clips. Be patient and use a flathead screwdriver or a similar tool to gently pry it off. Remember, you’re not just pulling it out; you’re preparing the area for its new counterpart.
Once the old gasket is out, clean the area thoroughly. Any leftover adhesive or grime can prevent the new gasket from sealing properly. Think of this step as prepping a canvas before you paint—it’s essential for the best results.
Now, take your new gasket and position it in the door frame. Make sure it aligns perfectly with the grooves and edges. If your model uses adhesive, press it firmly into place. If it uses clips, ensure they’re securely fastened. It’s like setting a new piece into a jigsaw puzzle—everything needs to fit just right.
Finally, close the door and check for any gaps or uneven areas. If everything looks good, plug the dryer back in and run a short cycle to test the seal. If you’ve done it right, your dryer should run smoothly, and you’ll have taken a small but mighty step toward a more efficient appliance.
Say Goodbye to Leaks: Easy Instructions for Replacing a Dryer Gasket
First, make sure your dryer is unplugged. Safety first, right? Once that’s sorted, you’ll need to locate the old gasket. This is typically found around the dryer door. To remove it, gently peel it off. Some gaskets are held in place with screws or adhesive, so keep an eye out for those.
Next, clean the area where the old gasket was. You don’t want any leftover residue messing with your new gasket’s seal. A simple wipe with a damp cloth should do the trick. If there’s any old adhesive, you might need a bit of rubbing alcohol to get rid of it completely.
Now, it’s time to install the new gasket. Align it carefully around the door frame, making sure it fits snugly. If your new gasket comes with adhesive, press it firmly into place. For gaskets with screws, just tighten them up. It’s like putting together a puzzle—just make sure every piece fits perfectly.
Once your new gasket is in place, give it a test run. Close the dryer door and run a short cycle. Check around the edges to make sure there are no leaks. If everything looks good, congratulations! You’ve just saved yourself from the hassle of a professional repair and a whole lot of drying time.
Maximize Efficiency: A Comprehensive Guide to Changing Your Dryer’s Door Gasket
So, how do you tackle this seemingly small but impactful issue? First, check the gasket for visible damage like cracks or tears. If it’s not sealing properly, it’s time for a replacement. But don’t worry, it’s a straightforward process that even a DIY newbie can handle.
Start by purchasing a compatible replacement gasket. Your dryer’s model number will guide you to the right part. Once you have the new gasket, unplug your dryer for safety and open the door. Remove the old gasket carefully, which might involve prying it off with a screwdriver or simply peeling it away if it’s stuck with adhesive. Clean the area where the gasket sits to ensure the new one adheres well.
Now, press the new gasket into place. Ensure it sits evenly all around the door frame, and there’s no loose or overlapping parts. It’s like putting a new seal on a jar—just a snug fit will do the trick. Finally, close the door to check if it seals properly and test your dryer. With this simple fix, you should see an immediate improvement in drying efficiency and a decrease in your energy bills.
Isn’t it amazing how such a small part can make such a big difference? It’s like giving your dryer a little tune-up, ensuring it runs smoothly and efficiently every time you hit that start button.
From Frustration to Fix: How to Successfully Replace Your Dryer’s Door Gasket
First things first, you’ll need to grab a replacement gasket. Check your dryer’s model number and order a part that matches exactly. It’s like finding the right key for a lock—accuracy is key! Once you have the new gasket in hand, it’s time to get to work.
Start by unplugging the dryer. Safety first, right? Next, open the dryer door and inspect the old gasket. Most gaskets are held in place with adhesive or clips. Gently peel it off—think of it like removing a sticker from your favorite book. If there’s any adhesive residue, clean it up to make sure the new gasket sticks properly.
Now, place the new gasket in the groove where the old one was. Make sure it’s seated evenly all around. Some gaskets might need to be secured with adhesive, so follow the manufacturer’s instructions. Once it’s in place, close the dryer door and check the fit. It should seal tightly, like the snug fit of a lid on a jar.
Finally, plug the dryer back in and test it. Run a short cycle to ensure that the door seals properly and no heat escapes. Voila! You’ve successfully replaced the door gasket, and your dryer should be back to working efficiently. It’s a simple fix that can save you from more significant repairs down the line.