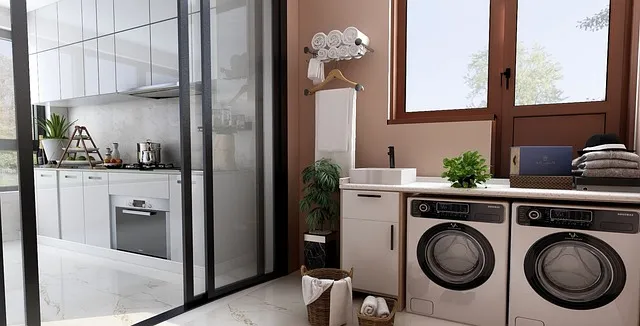
First things first: safety! Always unplug your dryer before starting. It’s like making sure your phone is off before you start a big presentation. Next, locate the exhaust vent flap, which is usually found on the outside of your home. It’s the flap that opens to let out hot air and lint. If you haven’t cleaned it in a while, it might be a bit like opening a dusty old book; you might find a lot more than you expected.
Start by giving the flap a gentle shake to see if any loose debris falls out. Then, use a vacuum with a hose attachment to suck out as much lint and dust as you can. It’s like using a high-powered broom to sweep away the cobwebs in a forgotten corner. For stubborn lint, a long, flexible brush can reach deeper into the vent. Just be careful not to damage the flap or the vent itself—think of it as navigating through a maze with delicate walls.
Once you’ve cleared out the lint, check the flap to ensure it opens and closes smoothly. It should move freely without any obstructions. If the flap is stuck, it’s like trying to open a door with a broken handle—it just won’t work as it should.
Finally, after cleaning, double-check the area around the vent for any additional buildup. This step is like giving your workspace a final polish to ensure everything is spotless. By following these steps, you’ll help your dryer run more efficiently and reduce the risk of potential fire hazards.
Unlocking the Secrets: Expert Tips for Cleaning Your Dryer’s Exhaust Vent Flap
First off, grab a screwdriver and carefully remove the flap cover. It’s usually held on with a few screws, so it’s a pretty straightforward task. Once you’ve got it off, take a good look at the inside. You might be surprised at how much lint and debris can accumulate here. Even a small build-up can impact performance, so don’t be shy about giving it a thorough clean.
Use a vacuum with a hose attachment to suck up the lint. It’s like using a mini vacuum cleaner to clear out a tiny room—every little bit helps. For those stubborn bits, a small brush or a flexible cleaning wand can reach into tight spots where the vacuum might struggle. If you’re feeling adventurous, consider using a dryer vent cleaning kit. They’re designed specifically to tackle tough lint build-up and can make a huge difference.
Don’t forget to check the flap’s mechanism. Sometimes the hinge or the spring can get clogged with lint or even just become stiff over time. A little bit of lubrication can help it move more freely, ensuring that it opens and closes without any hitches. Think of it like giving your door a fresh coat of paint—it just works better afterward.
Regular maintenance is key. Aim to clean the exhaust vent flap every few months to keep things running smoothly. It’s a small effort that can save you from bigger problems down the road, like potential fire hazards or costly repairs. So, roll up those sleeves and give your dryer’s exhaust vent flap the attention it deserves.
DIY Guide: The Ultimate Method to Tackle Your Dryer’s Exhaust Vent Flap
First off, let’s talk about what you’ll need. Grab a screwdriver, a vacuum cleaner, and some soapy water. That’s it! The flap itself usually has a simple design, but it can be tricky if it’s been neglected. Start by turning off the dryer and unplugging it for safety. Then, gently remove the flap from its position—this might involve unscrewing a few screws or just popping it off if it’s held in place with clips.

Once you’ve got it off, it’s time to clean. You’d be amazed at how much lint and debris can build up around that flap. Use your vacuum to suck up any loose lint or dirt, and give the area a good wipe with soapy water. This will help ensure that the flap opens and closes smoothly. If the flap itself looks damaged or worn out, it might be time to replace it. Most hardware stores carry replacements that are easy to install.
Reinstall the flap by aligning it properly and securing it with screws or clips. Make sure it’s aligned correctly to avoid any gaps that could let air or critters in. Once it’s all back together, plug your dryer back in and give it a test run. You should notice that it’s functioning much more efficiently, and your home will thank you for keeping that pesky outside air at bay.
This simple DIY task can save you time, money, and a lot of hassle in the long run.
Avoiding Fires: How Proper Maintenance of Your Dryer’s Exhaust Vent Flap Can Save Your Home
When you think about your dryer’s exhaust vent flap, picture it as a crucial gatekeeper. It lets out the hot, moist air your dryer generates while trapping the lint that could otherwise build up and become a fire hazard. Over time, lint can accumulate, especially if the vent flap isn’t functioning properly. This can turn your cozy laundry corner into a potential fire hazard.
Proper maintenance of this flap is incredibly simple but vital. Regularly check it for any lint buildup or obstructions. If you notice the flap sticking or not closing completely, it’s time to take action. A stuck or faulty flap can prevent hot air from escaping, causing it to build up and increase the risk of a fire. It’s like having a clogged chimney—it can quickly become dangerous if not cleaned out.
Clean the flap and vent regularly to keep everything running smoothly. A quick wipe and some periodic checks can make a huge difference in preventing fires. Imagine this small task as a form of home insurance. Just as you wouldn’t skimp on your car’s maintenance, don’t skimp on your dryer’s.
Keeping your dryer’s exhaust vent flap in top shape is a straightforward, effective way to ensure your home stays safe. Regular upkeep is your best defense against potential disasters, making this little part of your home’s exterior a true hero in fire prevention.
The Best Tools and Techniques for a Spotless Dryer Exhaust Vent Flap
First things first, let’s talk tools. A vacuum with a long hose attachment is a game-changer. It’s like having a super-powered broom for your dryer vent. Use it to suck out any lint that might be lurking inside the vent. For those hard-to-reach areas, a dryer vent cleaning brush is your best friend. Think of it as a giant pipe cleaner that you can maneuver into tight spots to dislodge any stubborn lint.
Another nifty tool is the vent cleaning kit, which often includes a flexible rod system. This setup allows you to extend your reach into the vent, making it easier to scrub away any buildup. It’s like having an extension of your arm, perfect for those tricky spots.
But tools are only part of the equation. Techniques matter too. Regular cleaning is key—every 6 to 12 months, depending on your usage. Make it a habit, just like changing your air filters or checking your smoke detectors. Start by disconnecting the dryer from the vent and inspecting the flap for any visible lint. If you spot any, give it a thorough clean. Use your vacuum or brush to remove as much lint as possible. If you’re feeling adventurous, a leaf blower can be surprisingly effective for blowing out debris from the vent.
Don’t forget to check the outside of your house as well. Sometimes, debris can accumulate around the vent opening, so a quick sweep can keep everything running smoothly. It’s a bit like keeping your car’s exterior clean to ensure it functions well on the road. Regular maintenance keeps your dryer in top shape, ensuring it operates efficiently and safely.
Is Your Dryer Safe? The Essential Steps to Clean Your Exhaust Vent Flap
First, let’s talk about why cleaning your exhaust vent flap is so essential. Over time, lint and debris can accumulate, turning your once efficient dryer into a fire hazard. It’s like stuffing a car’s air filter with leaves and dirt—it clogs things up and could lead to serious trouble. By keeping your vent flap clean, you ensure that air flows freely and your dryer doesn’t have to work overtime, which can prevent potential fires and extend the life of your machine.
Here’s a quick and easy guide to getting it done. Start by unplugging your dryer—safety first! Then, locate the exhaust vent flap, usually found on the exterior of your home. Gently remove any visible lint or debris from around the flap. Use a vacuum cleaner with a hose attachment to get into the crevices where your fingers might not reach. If the flap itself is clogged, you might need to remove it for a more thorough clean. It’s similar to cleaning out the filter on your vacuum cleaner—it’s messy, but absolutely necessary.
Check for any signs of damage while you’re at it. If the flap is cracked or doesn’t close properly, it could let in unwanted pests or cause drafts. A well-maintained exhaust vent flap ensures that air and moisture are expelled correctly, keeping your dryer operating efficiently and safely.

Regular maintenance is key. Set a reminder to check and clean your vent flap every few months to keep everything in tip-top shape. It’s a small task with big benefits—like putting in premium gas for that high-performance ride.
Stake Online Casino gameathlon.gr is one of the leading online gambling platforms since it integrated crypto into its transactions early on.
The online casino market is evolving and players have a vast choice, but not all casinos provide the same quality of service.
In this article, we will take a look at the best casinos accessible in the Greek region and what benefits they provide who live in the Greek region.
The top-rated casinos of 2023 are shown in the table below. You will find the top-ranking gambling platforms as rated by our expert team.
When choosing a casino, make sure to check the licensing, security certificates, and data security policies to ensure safety for players on their websites.
If any of these factors are absent, or if it’s hard to verify them, we do not return to that site.
Casino software developers are crucial in selecting an online casino. Generally, if the above-mentioned licensing is missing, you won’t find trustworthy software developers like Play’n Go represented on the site.
Reputable casinos offer both traditional payment methods like bank cards, but should also provide electronic payment methods like PayPal and many others.
Предоставляем услуги проката автобусов и микроавтобусов с водителем крупным компаниям, малого и среднего бизнеса, а также частным лицам.
Пассажирские перевозки в Челябинске
Организуем комфортную и безопасную доставку небольших и больших групп, предусматривая транспортные услуги на торжества, деловые мероприятия, групповые экскурсии и разные мероприятия в городе Челябинске и Челябинской области.